Yeah, I know this is 2 WE, I'm recycling graphics.
Secret Romulan Transmission: Romulan Hawk and Turtle - Dancing together
Romulan Star Empire Imperial Star Navy
Communication
All ships - all ships
*ROMULAN CAPTAINS EYES ONLY*
Riov K'tujHegh explains:
I started this style of play over the weekend and have been practicing it ever since. Not only is it effective against humans but it also works in single player against the AI (an important note since some strategies work well against humans but are very hard against AI - like a fleet of heavy cruisers). This style of play is complex. It takes practice (try single player mode). But the payoff means greatly increased tactics and firepower for a very low price.
Why tell others?
Well, I want you to be thinking about using this tactic and practicing it yourself. I've used it at higher BVP Early Era multiplayer matchups and it seems to be a good working combination. I've spent the past couple of days in single player with a SNB/WB+ fleet and it works there as well (even got ambushed by an Fed CL and 2 FFs and easily killed them all). Telling people may hurt me as an individual in Dynaverse2 - but possibly - help my Empire.
The premise
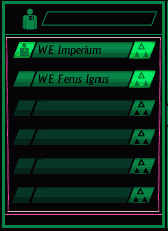
You young Riova has acquired enough prestige points (after 1 - 2 missions) to either upgrade from your SNB or purchase an additional ship in Dynaverse2. What to do? I recommend buying a WB+.
Why two smaller ships?
1) Mutual protection - Enemy may come to sit on you... but that R at point
blank is going to HURT.
2) Ace in the hole - If one of your ships gets in too much trouble, you still
have the other ship to fight in. Both a SNB and WB+ have heavy shields and armor
and can take a real beating and still fire their plasma.
3) More firepower - The WB+ adds a good long range weapon and close range alpha
strike.
4) Retreat for charging - When the SNB is spent, a common problem is that you
have to slow down to recharge. Wouldn't it be nice if you could fly back to your
WB+, cloaked, and THEN recharge for another attack?
5) Cheaper - An SNB and WB+ cost less than a WE and offer GREATER firepower and
tactics, not to mention all of the above points.
Why an SNB with a WB+?
Why a WB+? Well, two SNB really lack the punch without an R plasma. And, the WB+ has one great (and annoying) feature. It can't go fast enough to set off a mine. An AI-controlled SNB or WE will actually try racing up to you at full cloaked speed, right through mines. So, the WB+ makes a perfect companion. It's also much cheaper than a WE for about the same firepower.
Why a SNB? Well, it allows for both slow and cloaked or holding and fast play. It's the default ship of the empire. I fully expect I'll be upgrading it to a SPA or some other ship on down the road, but I play to keep the Hawk/Turtle lineup if it proves effective over time.
Finally, if you need to, you can take your SNB and run away. The lose of a WB+ is regrettable, but easily replaced with another. Who knows, if you take control of the WB+ after the SNB flees, you may yet win the fight.
Tactics:
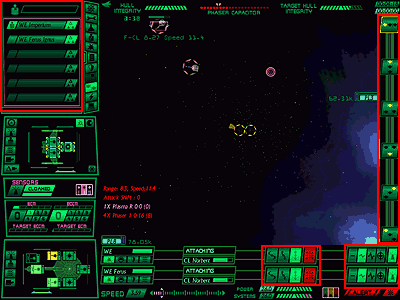
1) Both slow and cloaked, together - I've spoken of this before. Romulan ships sitting slow and cloaked, together in groups, are powerful ships to contend with. I do this at the beginning of the battle while plasma charges and when I retreat to recharge the SNB.
2) Hawk attacks, Turtle defends - Your SNB is holding plasma. You can now go off and attack at spd 31 while the WB+ sits behind, cloaked, in case you need it. This is nice if the enemy decides to play "keep away" from the Plasma R. Be sure to watch your WB+ to make sure nobody is sitting, pounding on it.
3) Hawk retreats, Turtle defends - The SNB has spent its plasma and needs to recharge. You can fly it back to the WB+, cloaked, at spd 28! Once there, slow down and switch control to the WB+ (or make it uncloak and fire) to get any pursuers off your back. Now you're back to tactic no. 1 while the SNB recharges.
Fleet actions:
Yeah, I know this is 2 WE, I'm recycling graphics.
Learning to control one's "fleet" of 2 or 3 Romulan ships is essential to survival for a single human player. The basics of control are under the Fleet Control MFD (Pages 139-144 in US manual).
Control panel-
This allows you to select a particular ship in the Fleet panel. You will find over time that the F6-F8 keys are actually faster. Practice with these instead of using the Fleet panel.
Formation Discipline Control-
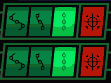
This allows you to somewhat control your AI ships. You want to set this to absolute control "o-o-o" so the AI doesn't do as many stupid things like uncloak or chase the enemy. It will still screw up your ECM settings, make weasels, void my repel tractors, etc. STUPID AI!
Weapons State Control-
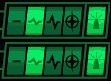
The weapons state control panel allows you to set regular, overloads, etc. More importantly, it allows you to tell the AI to stay cloaked with the special mode button (furthest on right). I always leave this checked after the start of the battle. If the AI is in control, I want that ship CLOAKED!
Formation Control-
![]()
With WB+, formation isn't that important (unless you want it to move somewhere else while you are near)
However, for WE and KE, they have a serious problem. The AI can speed up past spd 6 and will do so to stay in formation (even if it has to run through a mine to do it!). So using the formation control panel allows you to flip between formations and slow the AI back down (assuming you are nearby). Hint: Use the formations where you can either be in the lead or rear. Flip between them when you switch ships to keep the AI from moving. Again though, I don't recommend trying this tactic with anything other than a WB+ or the AI will get itself killed.
How I use the fleet controls:
1) Set control to max. "o-o-o" for all ships.
2) Set special mode to be on (for cloak).
3) Cloak first ship manually.
4) Select second ship (F7)
5) Setup formation grouping (depends on ships)
6) Fire second ship's R
7) Cloak manually
8) Select first ship (F6), make repel tractor, set ECM, uncloak, fire, etc....
Bugs to remember:
1) Using "fleet" has a serious problem in v5.5. You will often lose your current acquired target. Oh, it looks like you have the target acquired, but try firing weapons. They will either not fire or go sailing off at another target. After you flip ships, get in the habit of reselecting the enemy again ("Y" key or click on target).
2) HETs. If one of your fleet HETs... any of the others can now do so for free. HET in one, flip to another one and HET some more. Great if you need to bring that R to bear but HET is under 100%.
Notes on AI:
If you switch control from your SNB to the WB+ at any time, the AI will take over the SNB and do three things you want to IMMEDIATELY correct when you get back to the SNB. Stay in your WB+ the shortest time possible (uncloak, fire, recloak!).
1) Create a WW - if you're only in the WB+ for a minute, you can cancel its
creation.
2) ECM - The AI will often set ECM to 4 in the SNB. Reduce it to 1 or 0.
3) Phaser capacitor - The AI sets it to Max. reduce it to half or less.
Power Management
This is very important. If you take your SNB out for an attack run, your WB+ will try to catch up with it. If you do not set your power priorities as below, the Plasma R on the WB+ will NEVER charge:
3 - Movement
1 - Weapons
5 - Shields
5 - Tractor
2 - ECM
Note: If on an attack run, you MAY have to change these temporarily in the SNB to haul you ship away from some plasma or missiles. Be sure and switch it back.
Conclusion: Quite by accident, I think I stumbled on a winning combination of slow and fast ships for Romulan captains. These tactics also give a "one shot" ship a very useful place in our arsenal of weapons. In fact, I expect this may be so useful that we'll be scrounging for more WB+ ships instead of ignoring them. In later eras, I plan to continue to buy WB+, even while driving my light and heavy cruisers, since they offer great, low-cost aces in the hole.
Good luck captain.